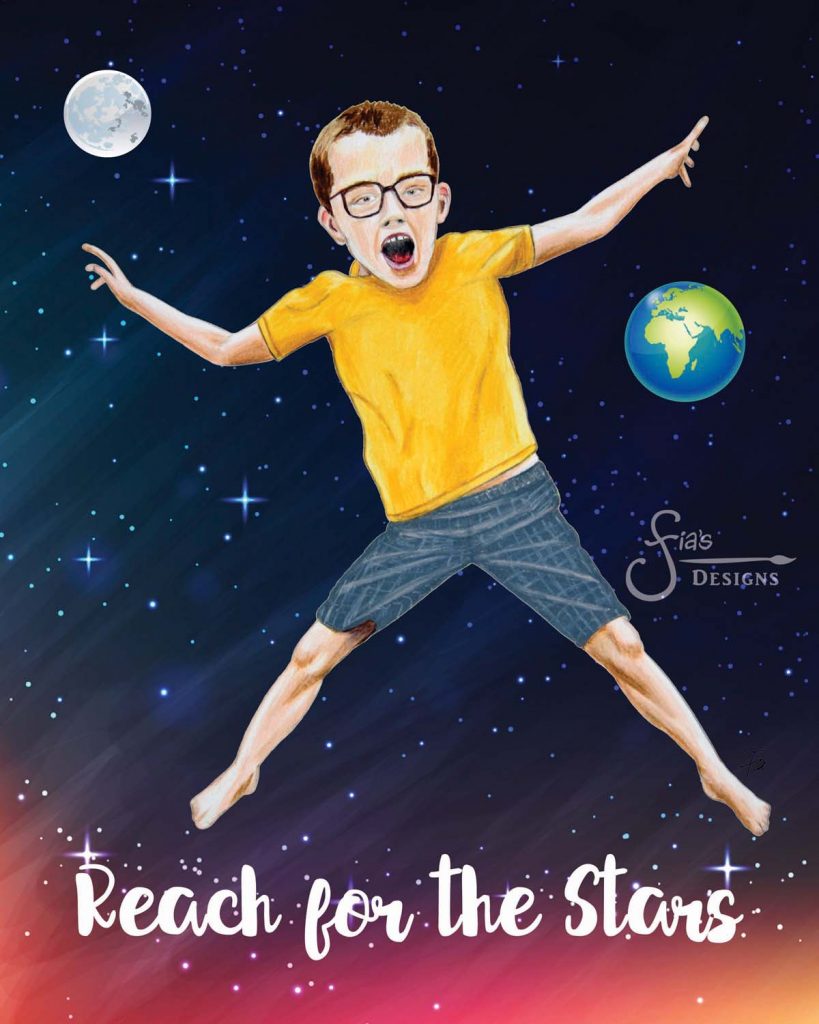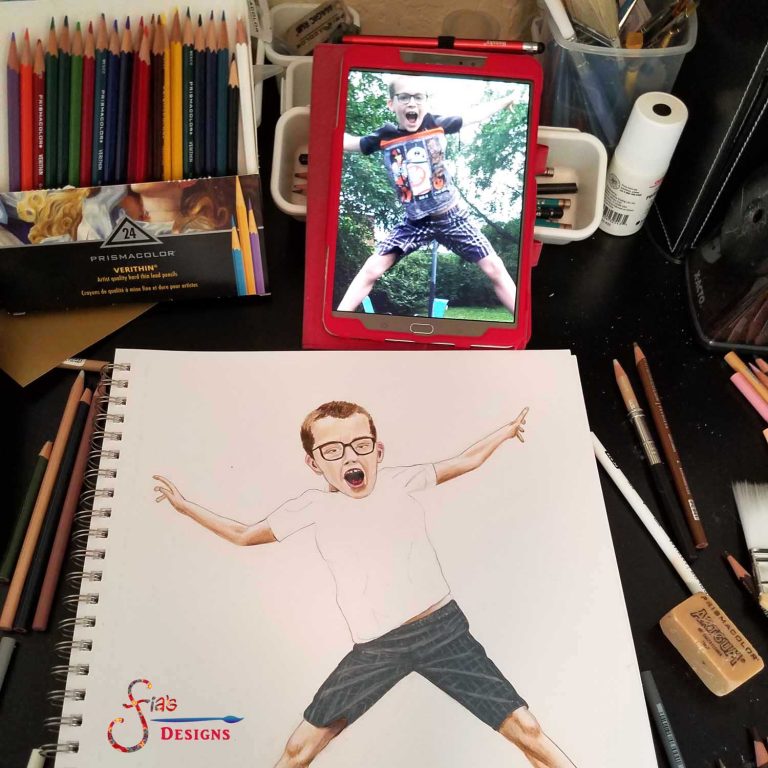
Here’s a behind-the-scenes look at one of my new custom illustrations “Jump”. It’s a photo of my friend Amber’s son. She’s the owner of Mt Nittany Creations, a wonderful Etsy jewelry shop with creative handmade pieces.
My Illustration Process:
- I start out with an interesting photo of a child in an expressive gesture. I study the photo to get acquainted with the posture, alignment, expression and feeling. I visualize it already drawn and how I might make a background design to go with it. When I get a strong visual image of the end result, then I will begin drawing.
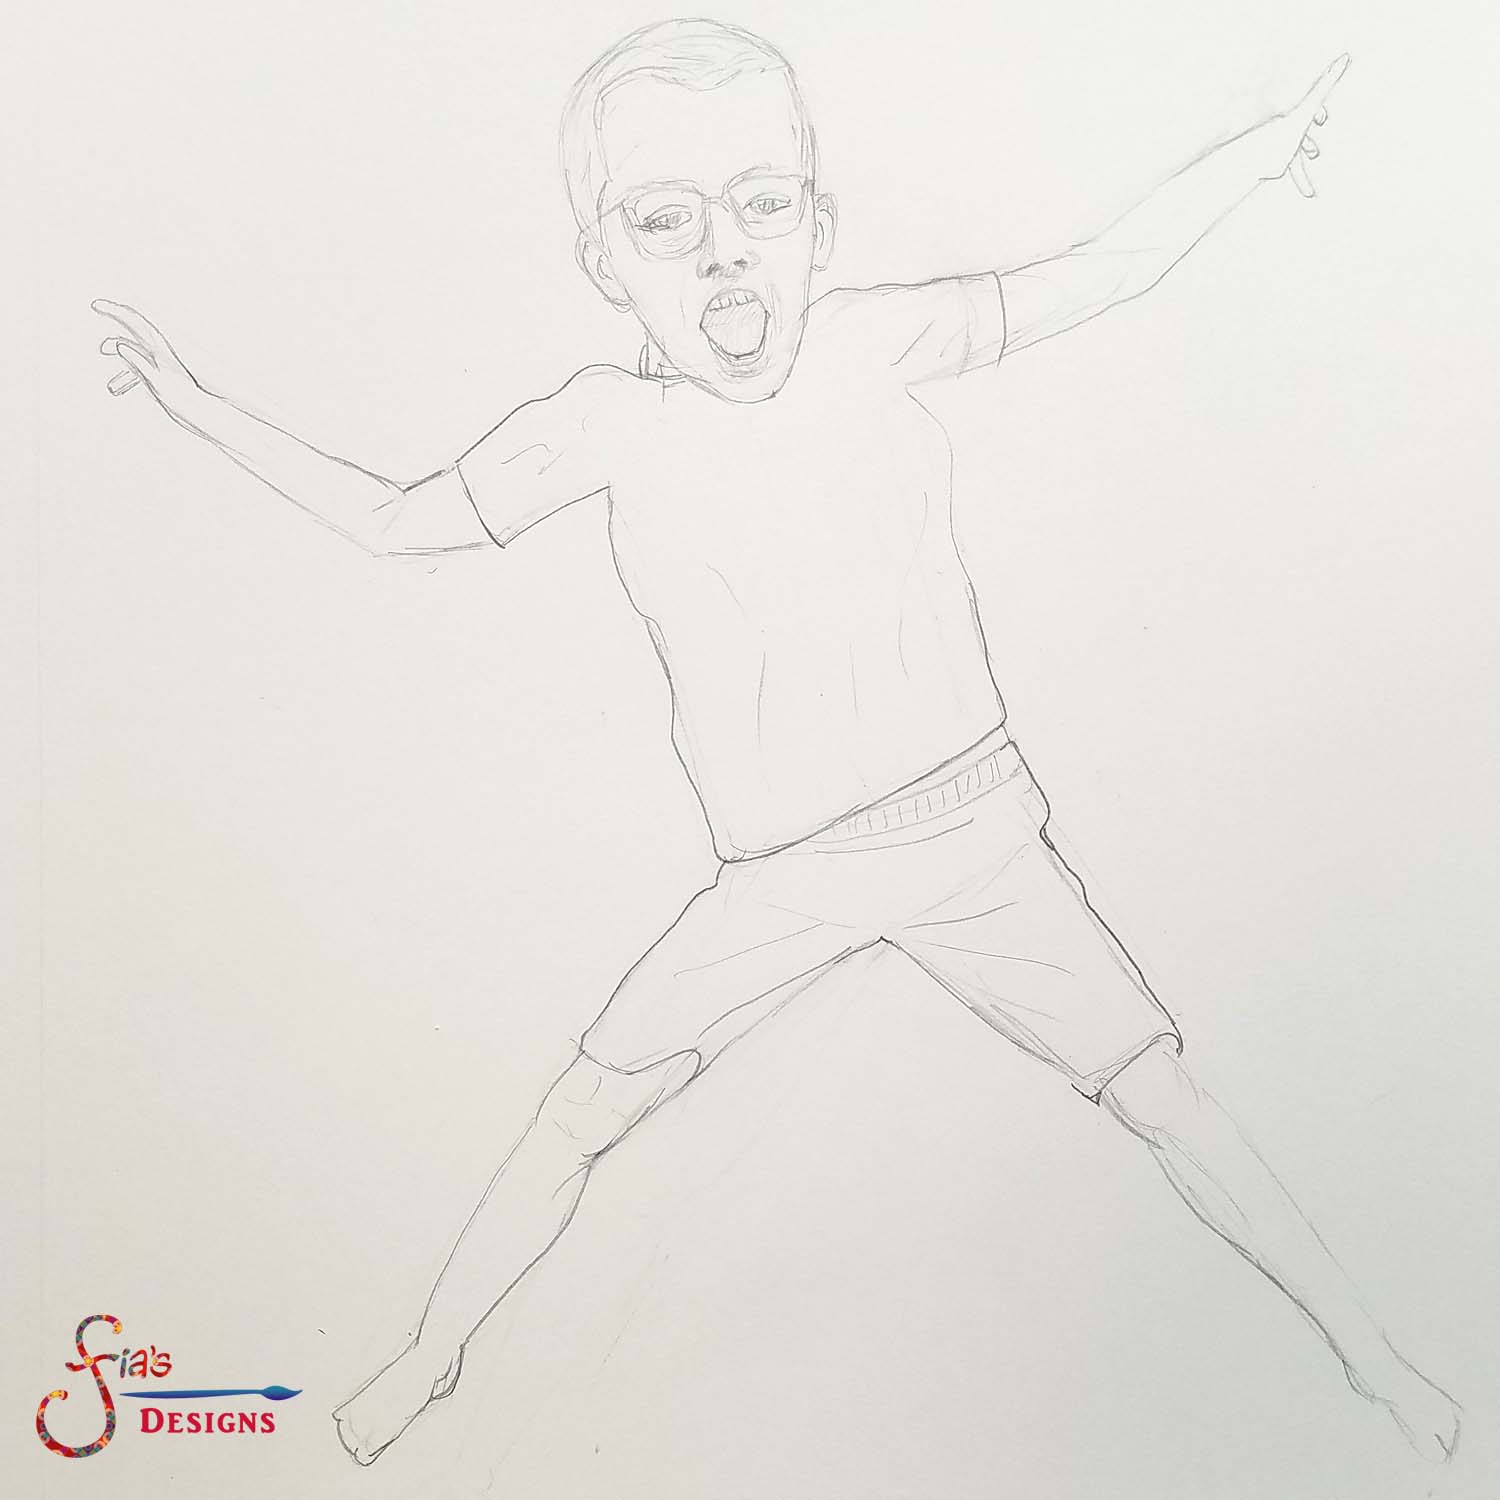
- The first part of sketching is to measure the proportions of the original versus the size of the paper I will be drawing on. I often enlarge the image. My trick for maintaining the proportions is to measure how many ‘heads’ tall or wide the person is in the photo. I do this by marking the length of the head in the photo on a small paper, and then count how many down for the height, and how many across for the width of the pose. I take another piece of paper and mark the head size for the drawing, and duplicate the number of heads tall and wide with small guide marks on my drawing paper.
- Then I begin the second part of the sketch by drawing very lightly with a graphite pencil, and drawing the entire person’s outline and loosely drawing the limbs and face. Next are the moderate details. The eyes and mouth tend to be the most expressive and I focus on getting those correctly.
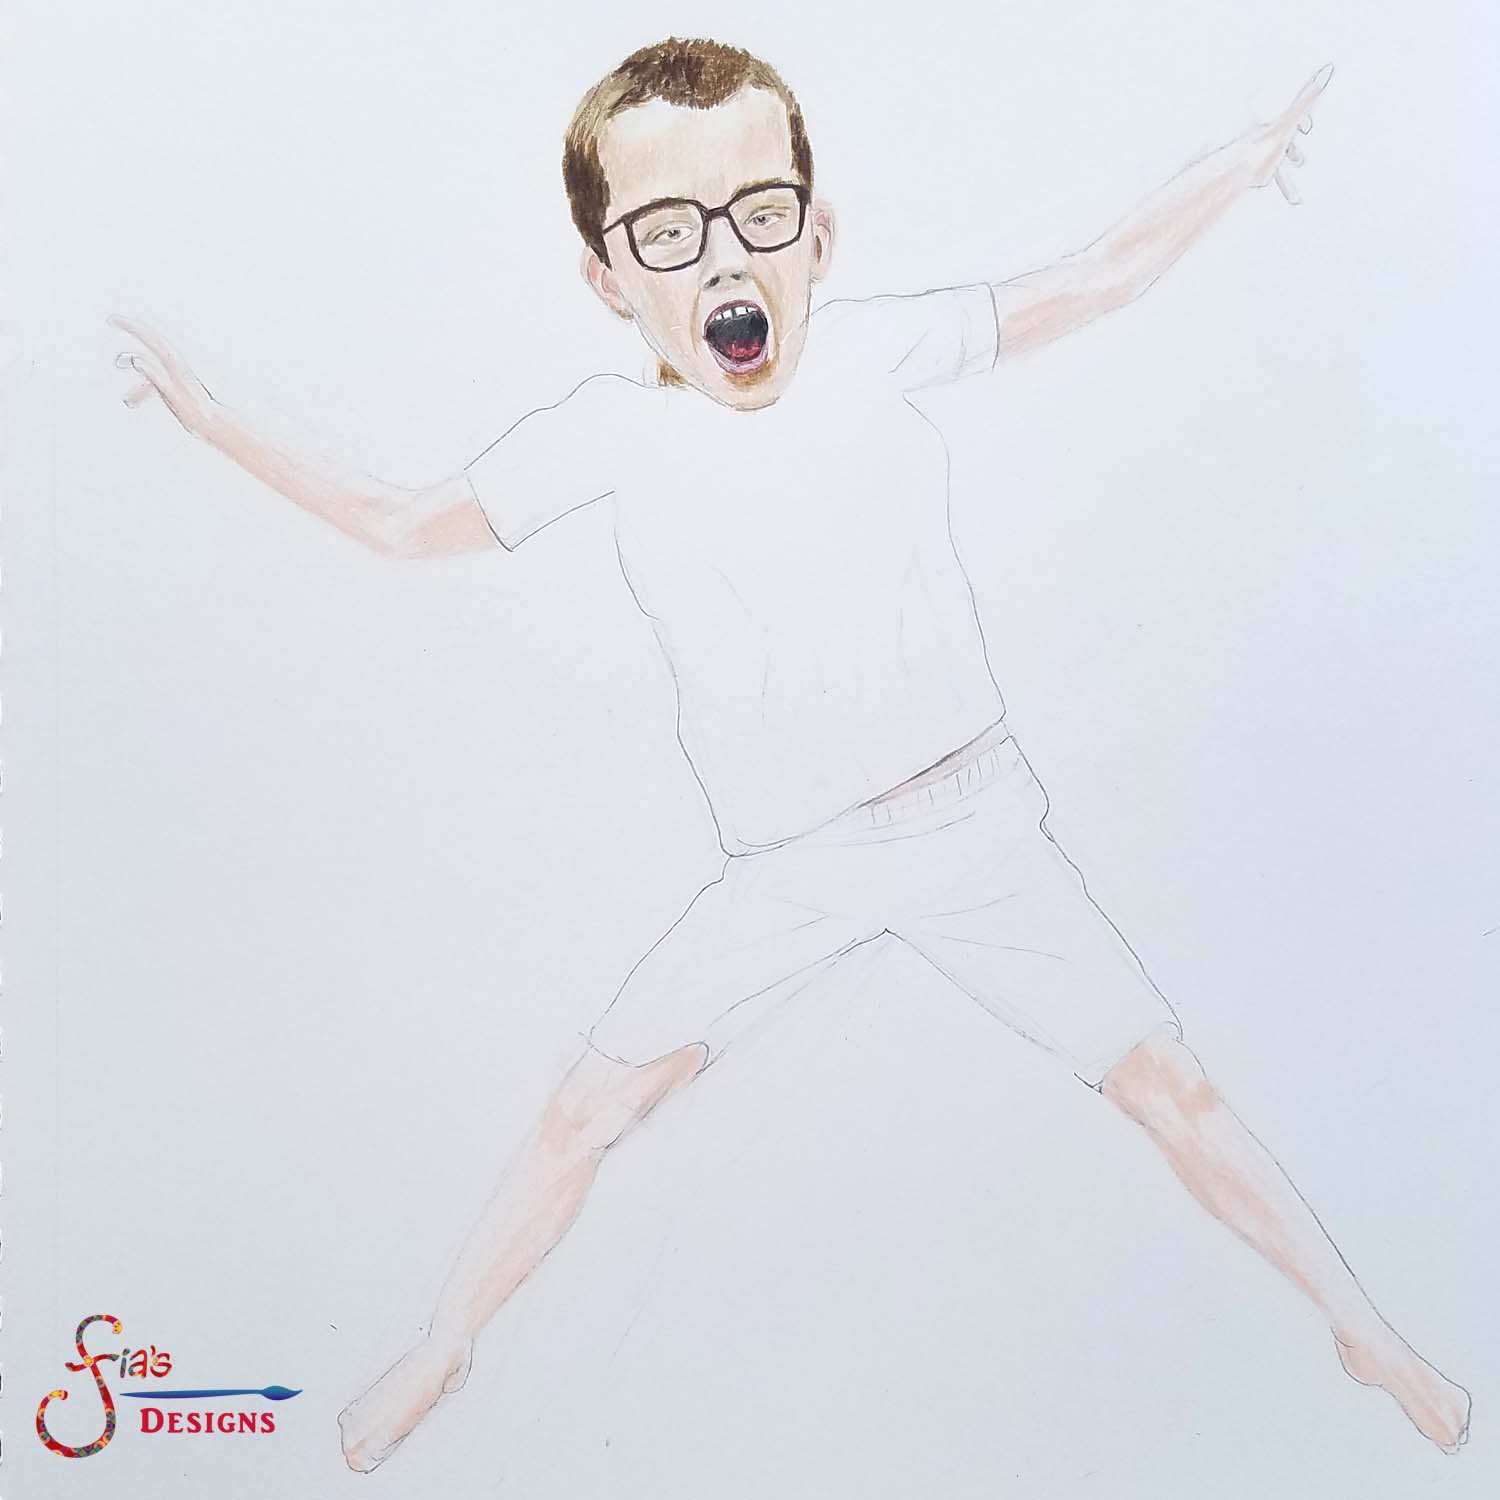
- Once the entire person is drawn proportionately, with the important details in place, then I use a rubber eraser to lightly erase all of the graphite on the surface of the paper. I have to do this before using colored pencils, or the graphite will smear and make it unable to erase.
- The fun part begins when I can start coloring! I use Prismacolor Premier colored pencils because they come in 150 color variations and they are thick and waxy, which is great for me because I press very firmly on the paper! Plus the colors are vibrant and bold–which is also my style too!
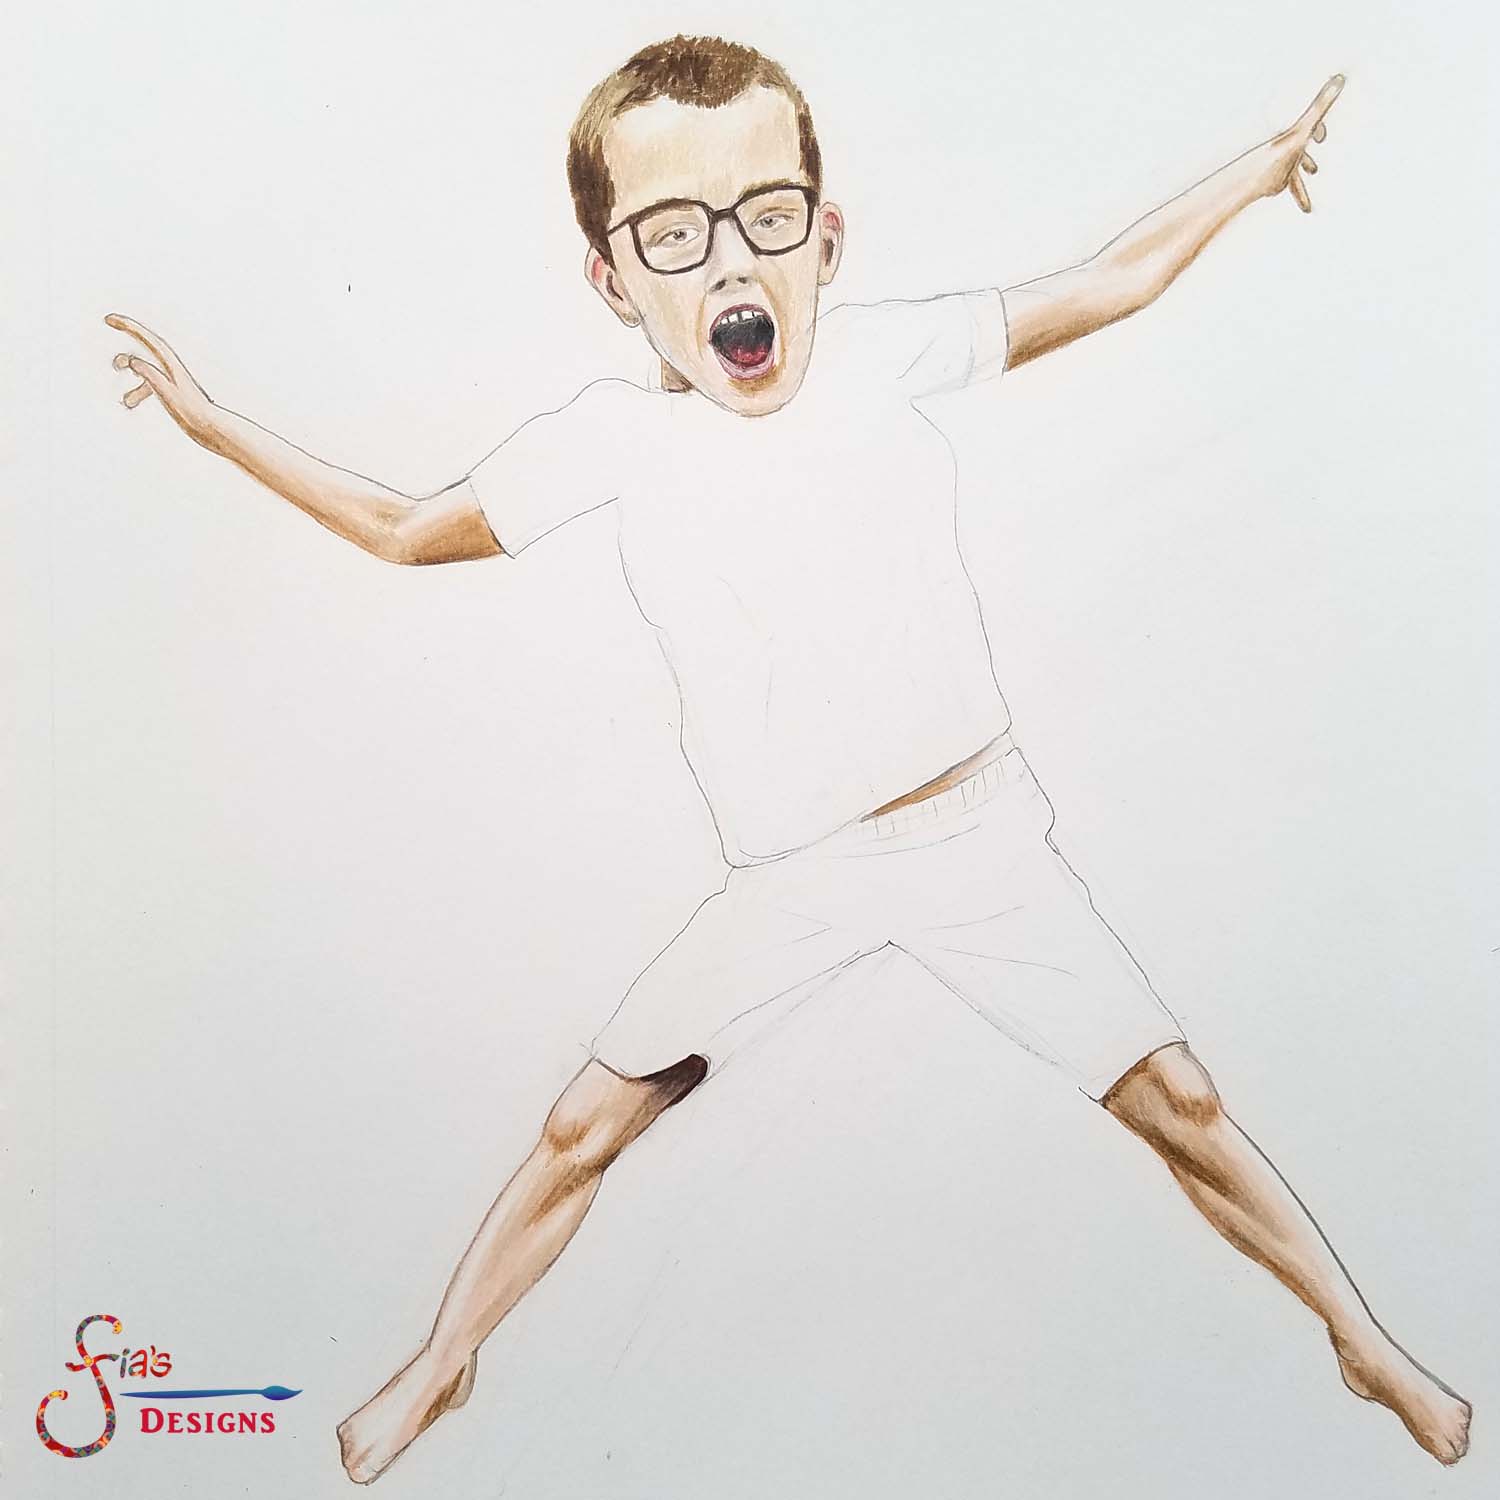
- I do start lightly at first because you can’t really erase the colored pencils. That’s one of the downfalls, but I’m up for a challenge! So I usually start with the skin tones and look at the shadows and highlights. I work light to dark and fill in the contours of the face and limbs. They eyes really tell the story, so I take extra care to make them expressive. Then the mouth and other facial features. The hair usually ties it all together and often falls in the face, so that is done last.
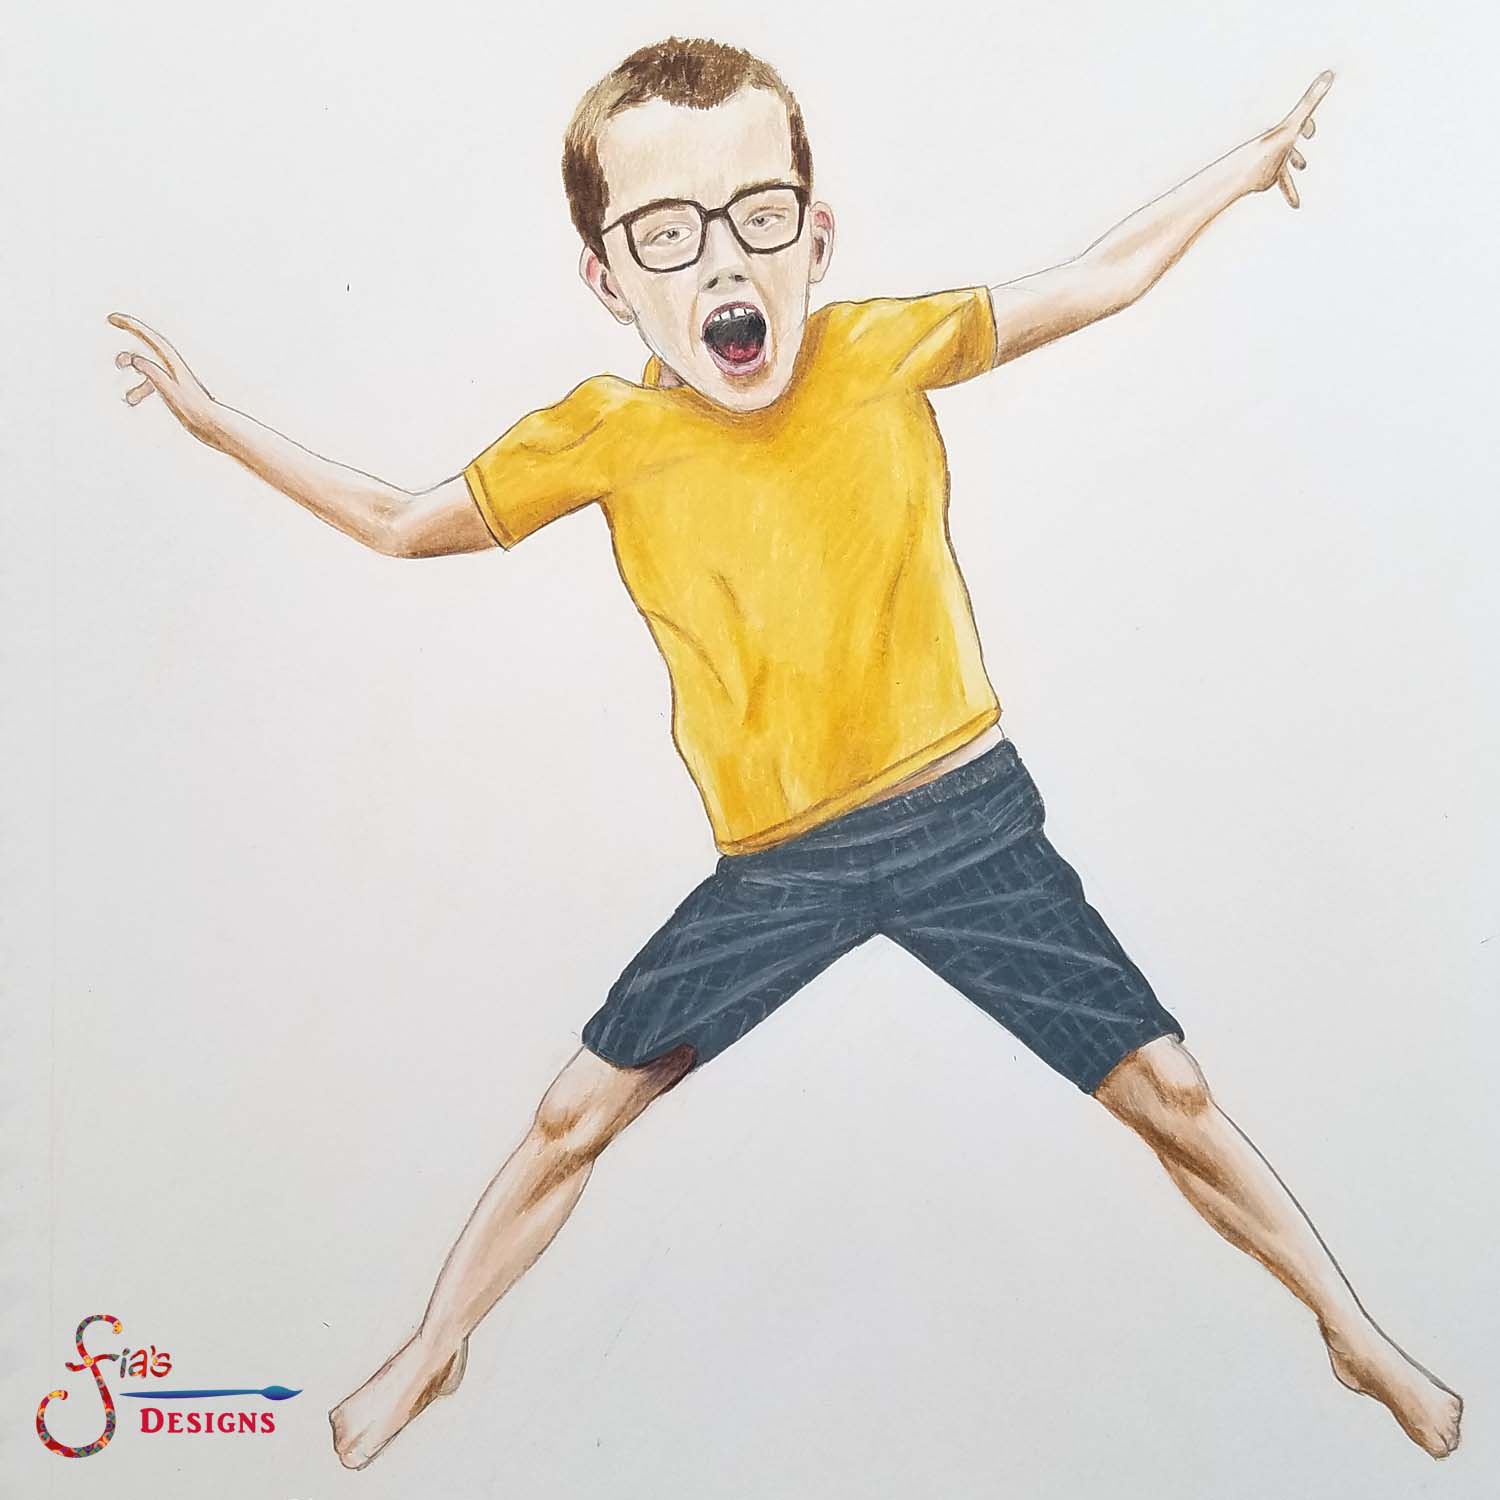
- The next fun part is coloring the clothing! I often change the colors or patterns of the photo’s clothing with the end result in mind. For this drawing, I knew that the boy would be in a dark galaxy in space, so I made his shirt in a contrasting yellow color. Getting the clothing wrinkles shaded in are what makes it look 3-dimensional. It’s a challenge, but when I get it right, it looks great!
- My new style is to leave the background white so that I can add digital backgrounds and change for the seasons. And I really like just drawing people, so trees and furniture get tedious for me.
- Once the drawing is complete, I photograph it with a high resolution digital camera, which allows me to print up to a 13×19 poster size if needed. Then I open the digital photo on the computer and use a photo editor to remove the background. This is a lengthy process because I clean the edges of the entire drawing by using a stylus. It takes a couple of hours. And if there are any flaws in the drawing, like a smudge or a pencil mark, I can fix it digitally.
- After the digital drawing is cleaned up, then I can look for a digital background or multiple backgrounds, to place behind the drawing to make it look like it’s in a new environment.
- The final part is to add a saying or word to the drawing to give it an inspirational message. These can be customized or changed easily.
- From the final, I create all sorts of stationery and art gifts like: art prints, greeting cards, journals, planner clips, pendant keychains, pendant necklaces, and even phone wallpaper screens!
Soon I’ll be offering Custom Drawings and a Custom Drawing Giveaway. Subscribe to my Newsletter to be the first to know! Thanks for your support of an Artist!